- You can add subscription feature to app from feature list page.
You can buy the module from here.
You can add this feature multiple times to create various plans and add these to folder feature to show them all as list. - Subscription Settings : Once added it will load all complete with default product/settings etc to help you understand it better. You can just change the details as per your plan.
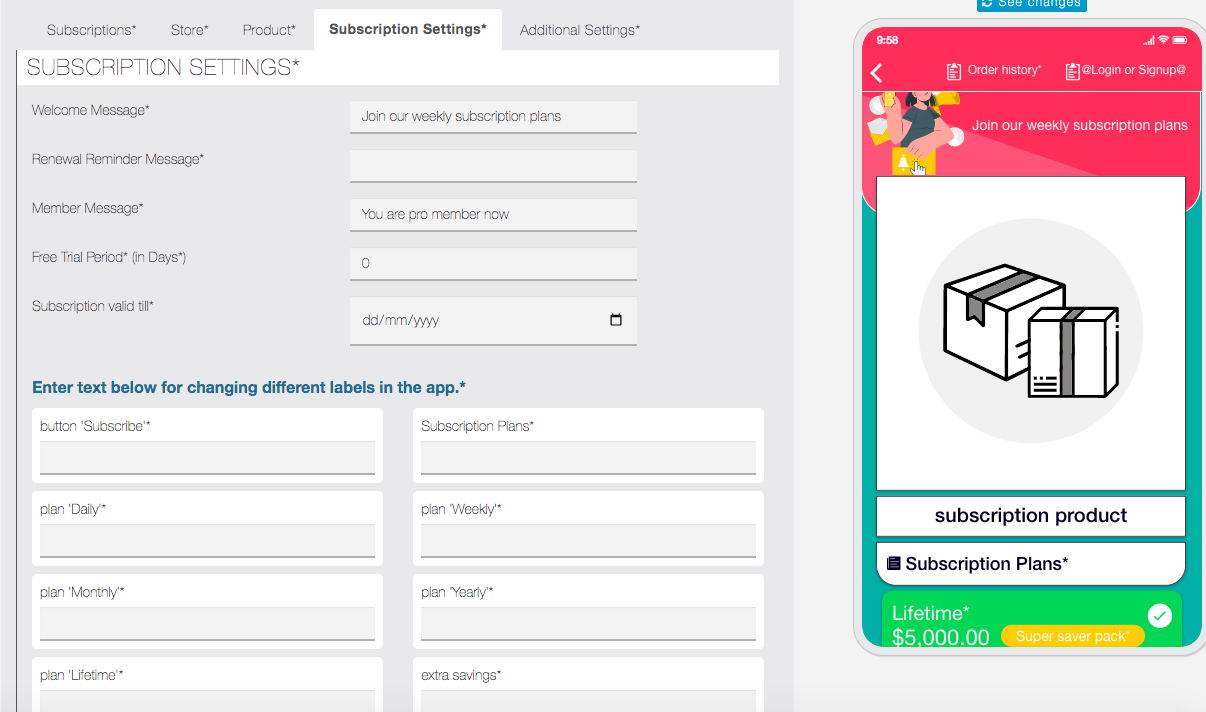
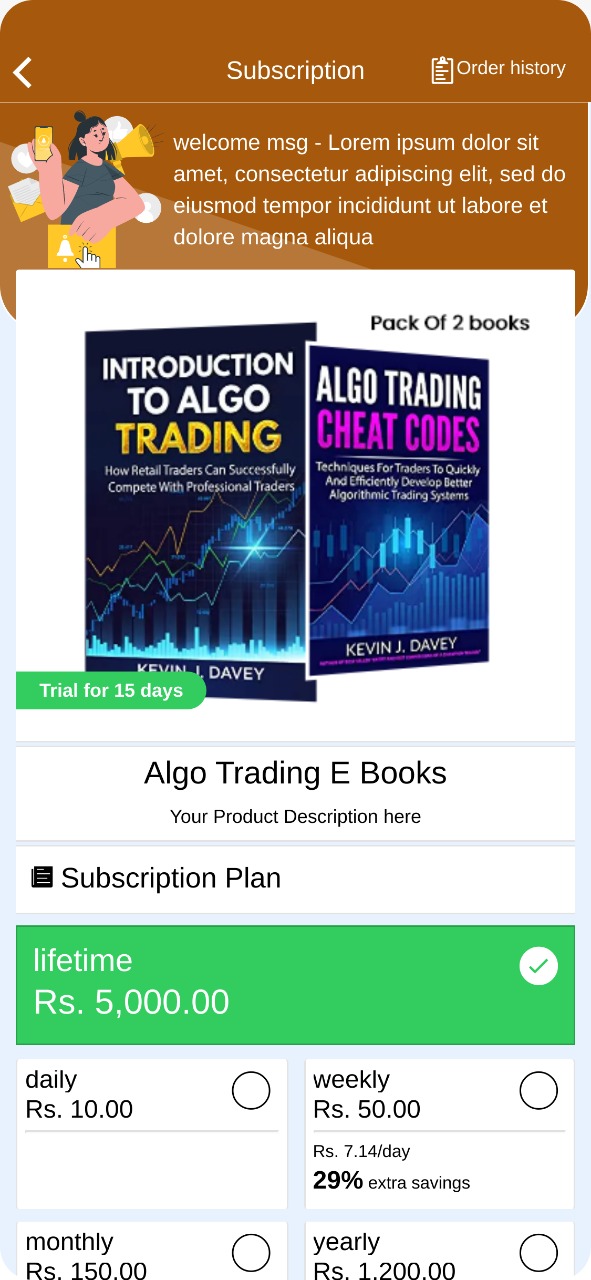
Welcome Message : It will be displayed to app users on top of the subscription feature page.
Renewal Reminder Message : It will be sent to app users if their plan is due renewal in case of offline payment method. In case of Stripe/Paypal this won’t be sent as auto recurring payment is already configured on initial purchase.
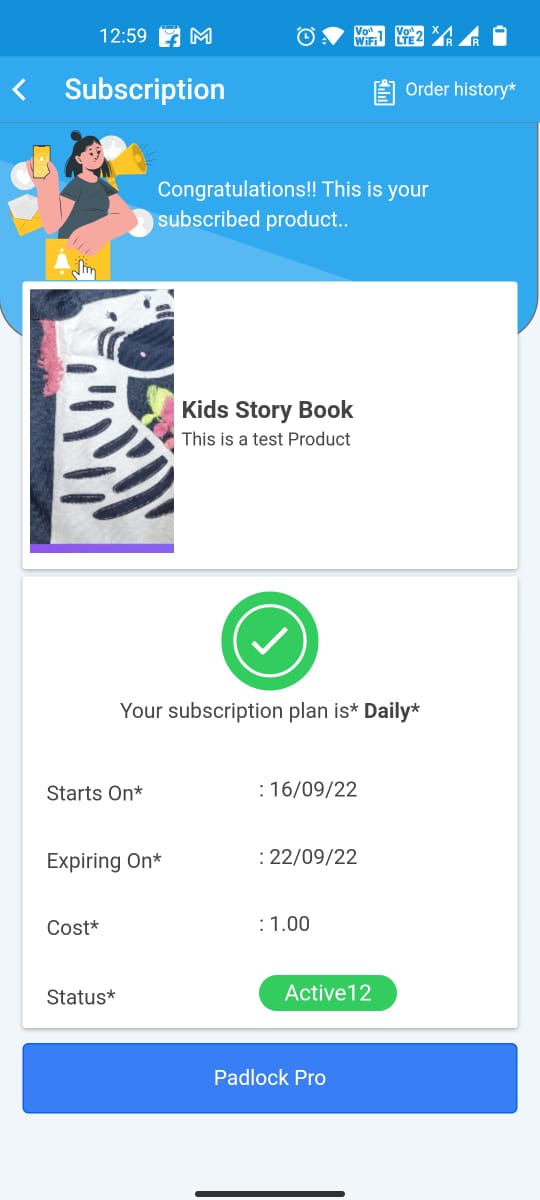
Member Message : It will be displayed to app users after they purchased the plan on the subscription feature page.
Free Trial Period : No. of days user can try this plan. In case of offline payment method. Status of plan will go to pending status and App admin needs to activate it manually from subscriptions tab. In case of Stripe/Paypal( recurring payment) trial plan is already added in initial purchase and the process is automated.
Subscription Valid Till : Expiry date of this plan offer. App user can’t purchase this plan after this date.
Features to unlock after payment : You can select feature that needs to be auto-assigned to users after successful plan activation. This option will be available only if Padlock pro is added to app.
Note: You will need to update your Padlock pro and Commerce Pro module to latest version to utilise the integration from this module.
Some Language label Settings : You can change label of most of the possible button/text in the app. - Product : Here you can configure your plan/product details.
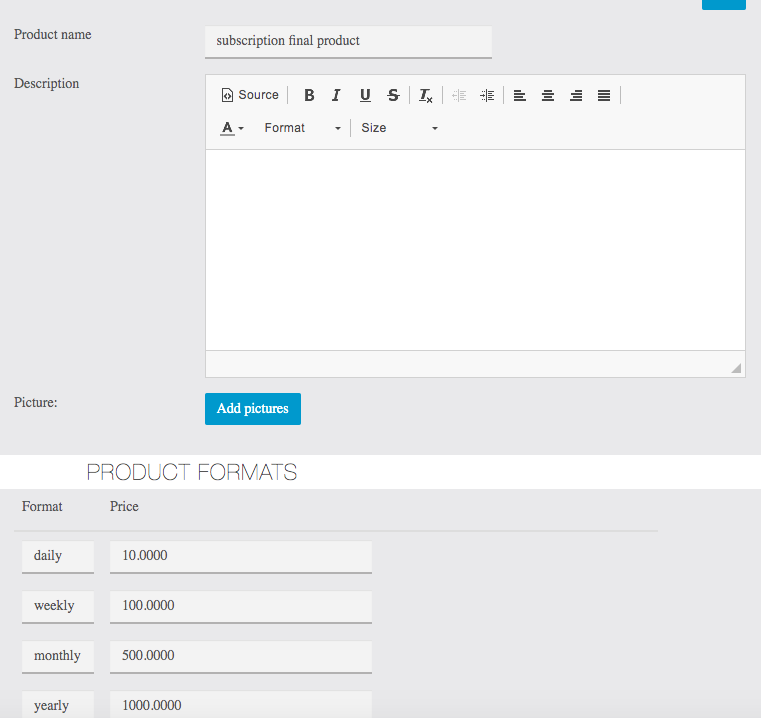
You can add product name/description and image related to your plan and it will be visible on app side on the subscription feature page.
Format is important setting to create your plan pricing. You can put -ve value if you don’t want to offer any pricing option. For example enter -1 as daily price to disable/hide this price option for the app user. - Store and Payment Method : You can change store details and Payment method to enable for this plan in this tab.
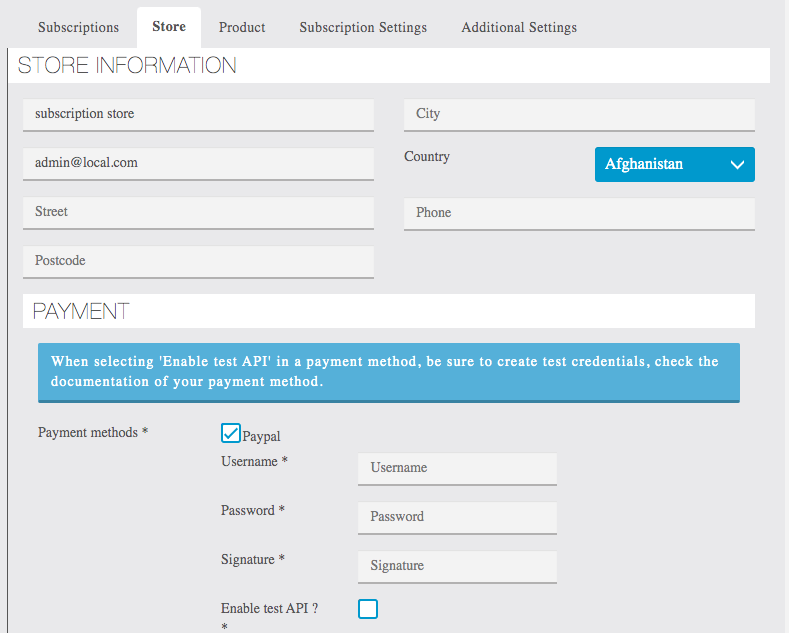
Store details are used in emails that are being sent to users on purchase.
Paypal/Stripe: Currently these 2 gateways are supported for recurring payment. If you enable these it will automatically create recurring plans for the user on purchase.
We can add recurring support to your local gateway too if you are willing to pay for development. Please contact us with your requirement.
Offline Payment Mode: In case of offline payment mode like cash/cheque etc , user will be able to place the order and then their subscription will be into pending state. Admin needs to change the status from Subscription tab of editor side to activate it. - Subscriptions – You will see a list of all the subscriptions purchased by app users here.
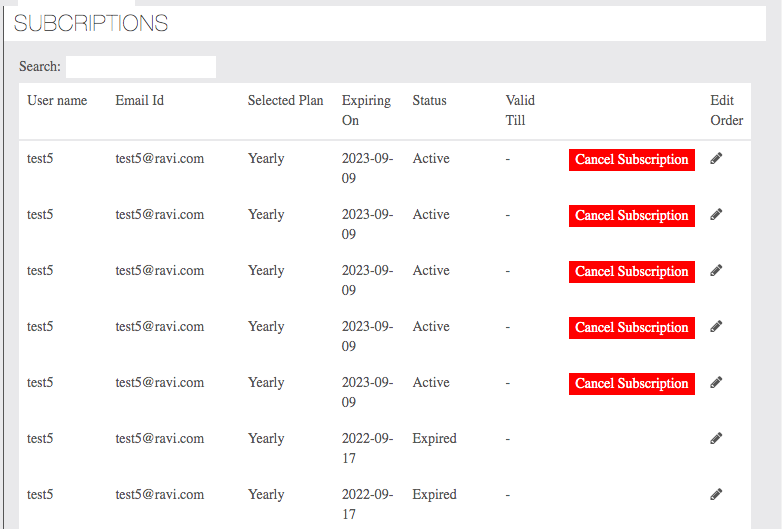
You can activate and cancel subscription plans from here. Edit order will allow you to change order details for your reference purpose. Changing any order details won’t affect the subscription plan etc. - Additional Settings: You can change the date format and other labels from here.
You will see many settings related to Commerce Pro here. Please ignore other settings for now. We are going to hide irrelevant options from here as we soon finalised other modules’ integration. - Congratulation your subscription plan is ready for your user to buy.