After installing the module you will see Booking Pro feature added in your installed feature list in Editor -> Features section
- Click on Booking Pro feature and add into app
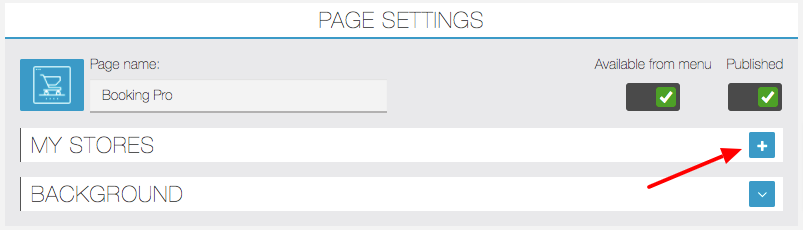
- You need to add your first store , click on + icon. Store may be your Hotel / Beach / Bus / Service provider In case of Appointment , it depends on your use case. Schedule/Payment gateways settings as based on store so you need to plan your app based on these settings.
3. Fill in all the details as shown below , related to store
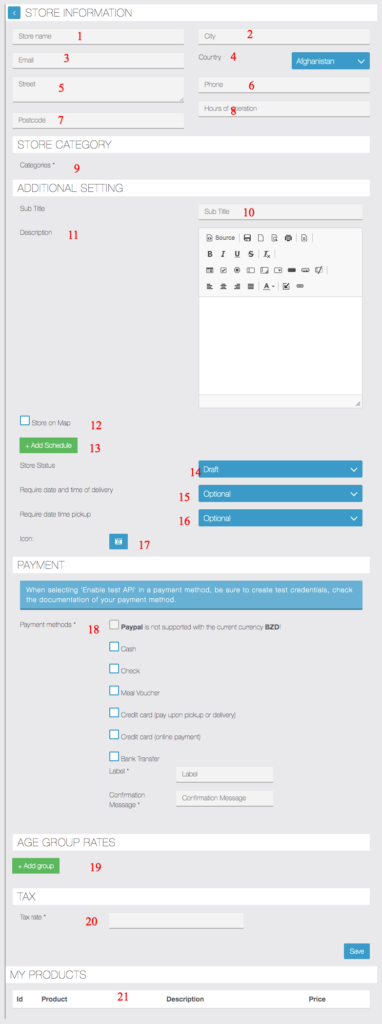
- Store Information like address and name, operations hours etc to be displayed in store list page, address is also used to calculate delivery fee (if enabled)
- Store Information
- Store Information
- Store Information
- Store Information
- Store Information
- Store Information
- Just for display purpose Store Information
- Store Categories are optional when you have just one store , you can use it when you have multiple store and can be created Stores -> Category section only after creating your first store.
- Title is used to display more store related info in app side
- Description is used to display more store related info in app side
- Enable of you want to display this store on map view
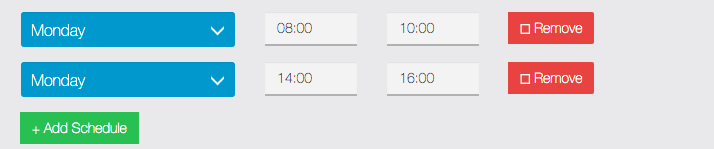
- Add Schedule – Here you can enter operation hours for Appointment or classes booking, you can add multiple slots for same day to allow breaks , example , You want to add 8am-10am , 2pm-4pm for Monday , then add two entries for Monday one for 8am-10am and other for 2pm-4pm , this way you have have multiple breaks for any day you want.
- Store status Draft – Not published in App. , Published – Visible in app to all users
- If you want to capture date/time for order in checkout process enable this * This is optional for now and we have kept it for future use case/scenario
- if you want to capture pickup time of delivery in checkout process enable this and make it mandatory if you want user to force this info -* This is optional for now and we have kept it for future use case/scenario
- Icon – is used to upload store image and displayed in app while showing this store
- These are the payment methods available with Commerce Pro and can be enabled per store after.
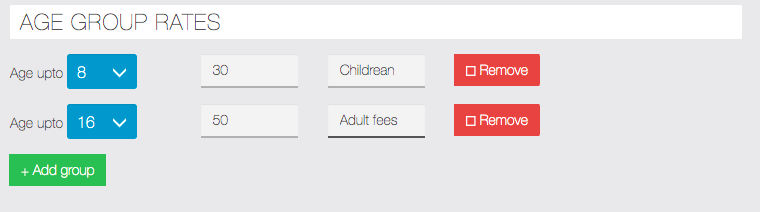
- Age group – Based on customers age group you can charge additional fees, here you can add different additional fees for various age groups, Please make sure that you keep lower age group first for example add rate for children first and then for adults as per screenshot below
- Add your first tax slab here